Vinyl decals are recommended for hard,
smooth non porous surfaces only!
STEP ONE (1)
Make sure the surface is clean, free of dirt, oils, dust and is perfectly dry.
STEP TWO (2)
Measure & Align
Align the decal to your liking using a tape measure or ruler.
STEP THREE (3)
Tape Decal Down The Center
Simply tape down the center of the decal and proceed to the next step in the installation process.
STEP FOUR (4)
Remove Wax Backing
Starting off on one of the sides carefully remove the wax backing from the decal.
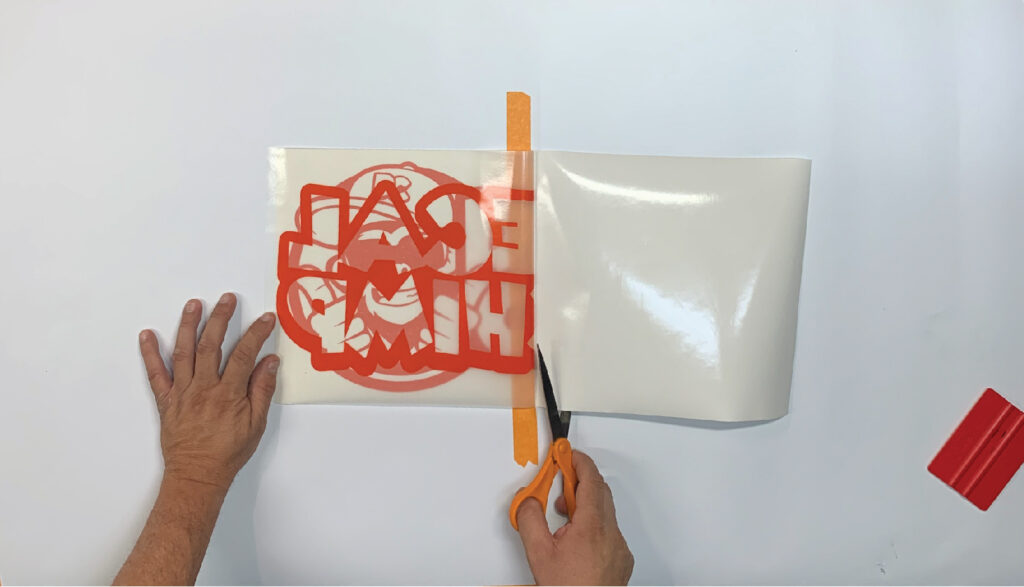
STEP FIVE (5)
Cut The Backing
Once the design is carefully lifted with the transfer tape you may cut the exposed backing and proceed to the next step.
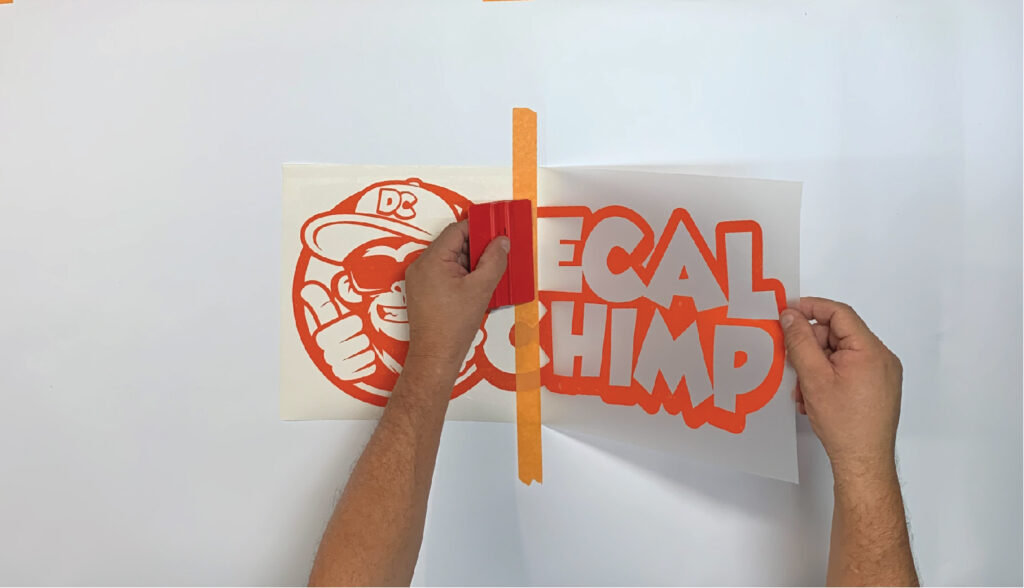
STEP SIX (6)
Squeegee On To Surface
Use an Application squeegee (only $1.95) or a credit card to press down on the decal so that the design sticks to the surface when the clear transfer tape is lifted.
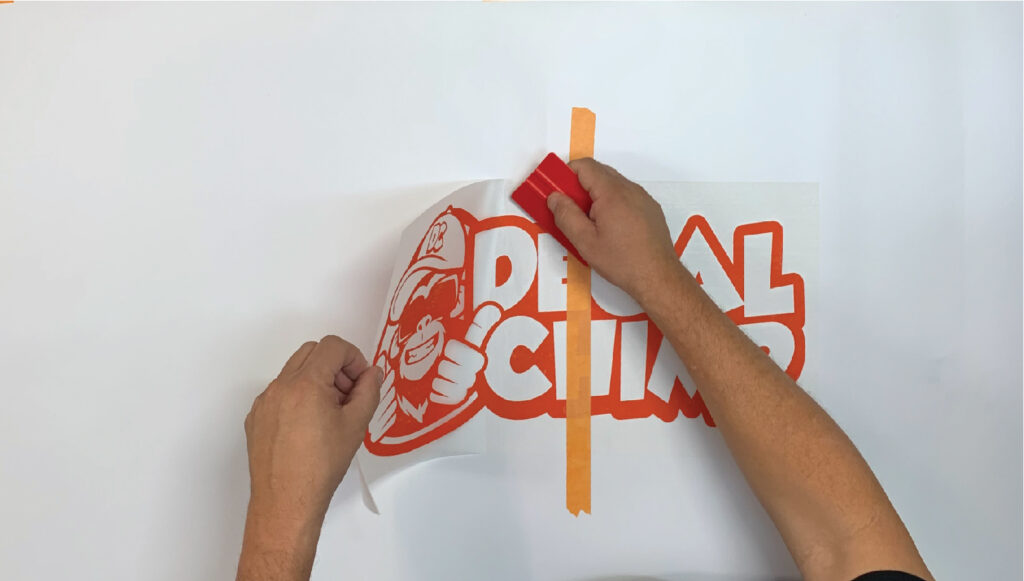
STEP SEVEN (7)
Repeat On Other Side
Repeat steps 4 to 6 as describe above on the opposite side.
STEP EIGHT (8)
Gently remove the transfer tape
pick a corner from the top and pull the transfer tape gently in a 45 degree angle as the picture shows, until all tape is removed. If any part of the decal comes off use the squeegee over the transfer tape again to reposition the decal and then proceed to remove the transfer tape until you succeed.
STEP NINE (9)
Enjoy Your Decal!
Have any questions? Need help installing? Call or text us. We are available to help you through the process. Enjoy your new decal!